
Configuring a Data Source (DSN) with ODBC Administrator
Step-By-Step instructions to create a User DSN.
- After installing ODBC/32, go to your PC’s Start menu and select Settings, then Control Panel. If you are running Windows 2000 or above, double click on Administrative Tools. Select either Data Source (ODBC) or 32 bit ODBC. The option will depend on what operating system you are running.
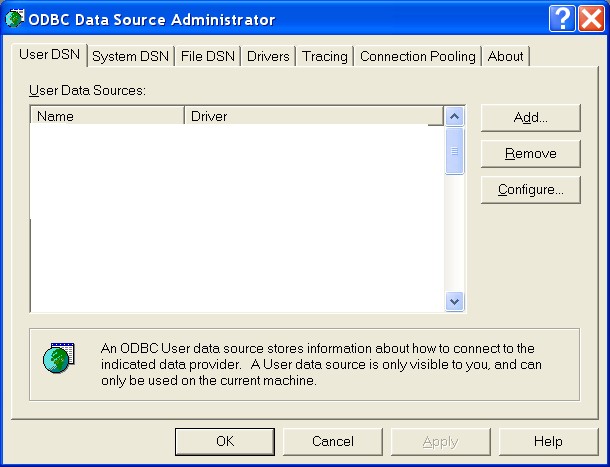
- The ODBC Data Source Administrator window appears. Select the User DSN tab if it isn’t already selected and then click the Add button.
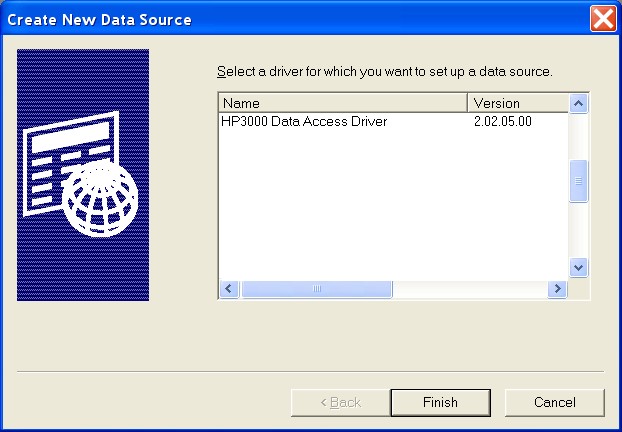
- The Create New Data Source box appears. Select the HP 3000 Data Access Driver then click the Finish button.
- Minisoft’s HP 3000 Data Access ODBC Driver box appears. In this dialog box we collect together all the information we need to configure ODBC/32 for a given application. It has eight tabs. You must fill in the Data Source tab, Connection tab, at least one of the Databases and/or the Schema tab, and /or the Self-describing File tab. The end product is a Data Source Name (DSN).

- Under the Data Source tab, fill in the Data Source field and optionally the Description field. This information will appear in the list of available ODBC sources in your database application.Note: This information is valid for this computer. Choose any name for the Data Source that will help you remember it and find it later. Useful ideas are the name of the main database you want to access or the MPE group the files reside in.

- Click the Connection tab. In this window you will enter all the information necessary to connect to your server.
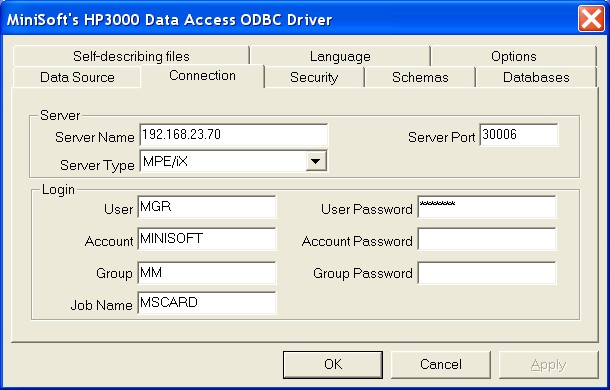
- At the Server Name field, enter either the Server Name or IP address of your server. For server Port, use 30006. For the Server Type use the pull down to select the host machine.
- Fill in the Login fields with the appropriate user information for accessing your database (this information is required to verify your access rights to the requested database). If you are logging onto an MPE/iX box use a session name (Security/3000 user name) in the Job Name field to allow user identification.
- If you are using VESOFT’s Security/3000 click on the Security tab. Enter the session user password into the Password field.If you do not use Security/3000 leave the Security/3000 field blank. If you are going to use the Catalog for Security, enter either <<WINUSER>> in the Catalog User field to use the Windows logon name or leave blank to default to the user and/or account specified on the Connection tab. The Catalog “Password” field is reserved for future use; leave it blank.
Referencing Data
You must choose at least one Database reference, Schema reference or Self-describing file reference. You may choose more than one of either or all three. If you define the same database in both places for the same DSN, you will open the database twice. You should NOT add the same name as both a Schema and Database reference.
- If you have or intend to define a schema file using the Schema Editor click the Schemas tab and the following window is displayed.

- Click the Add Schema button and enter the name of the Schema file. You must have a schema file to define the record layout for MPE and KSAM files. Qualified MPE file name as much as needed based on login information you entered on the Connection tab. If needed enter the lockword then click OK.
- A schema file may be needed for a TurboImage database for redefining items in a database such as: item name, length, type, extracting substrings, or date format manipulation.
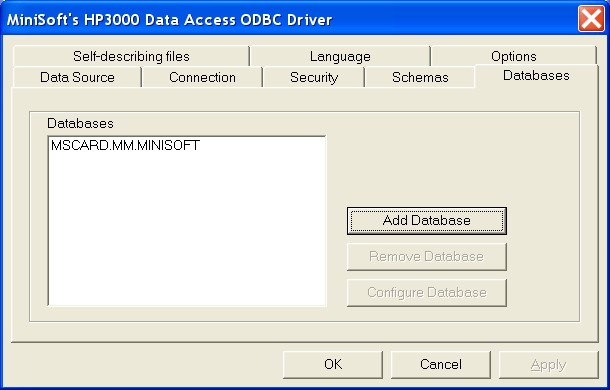
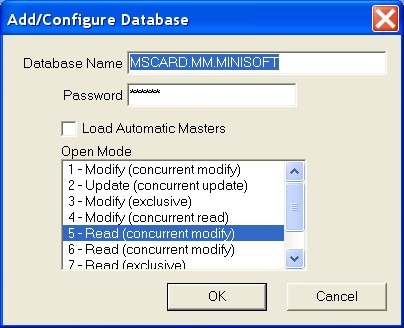
- To access your Image data directly click the Databases tab.

- Click the Add Database button under the Database tab. The Add/Configure Database window will appear.
- Enter your fully qualified MPE database name and password and select the appropriate Type and Open mode then click the OK button.*Note: Passwords for your TurboImage database are case sensitive.
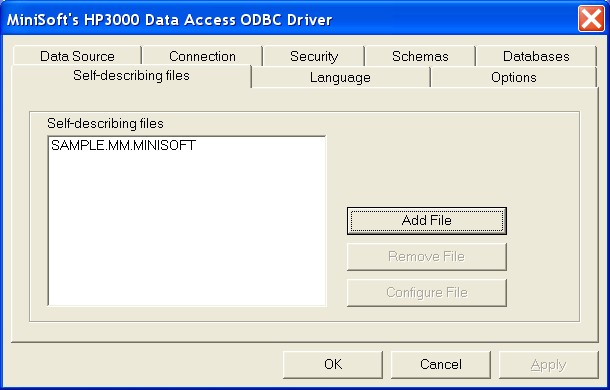
- To reference self-describing files, click the Self-describing files tab then click the Add File button.
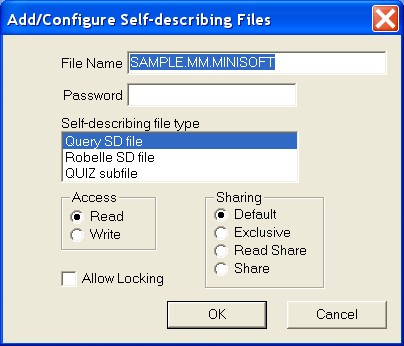
- Enter the file path name and, if it has one, password. Select the file type and choose the Access and Sharing properties. If other users will be accessing the file, especially in add or update mode, you will probably have to check the Allow Locking box. Once you’ve entered your choices click OK.
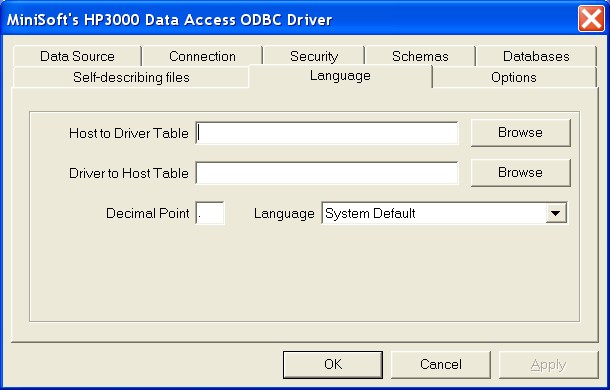
- To configure the respective conversion, select the Language tab. Enter the name of existing .tbl translation tables in the DSN configuration dialog box.
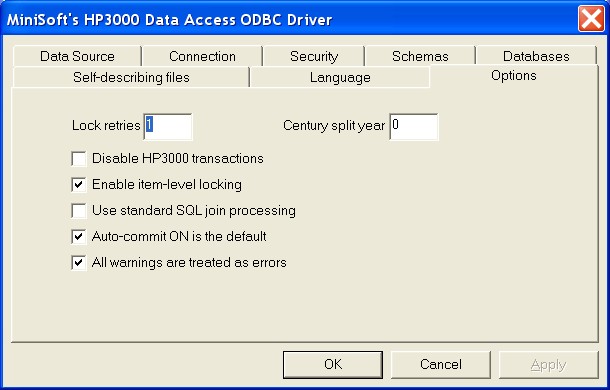
- The last tab is the Options tab. Under normal circumstances you will not have to modify any of the options.
- After filling out needed information in Minisoft HP e3000 Data Access ODBC Driver dialog box, click OK. Then open your database program, and the ODBC data source will now be available.