FrontPage 98
In order to complete a web query you must have two pages. The first page being the input page saved with a .htm extension. The second being the results page saved with a .asp extension (Active Server Page). Keep in mind that the .asp page you create will be linked to the .htm input page. The correct .asp page must be specified, or the association between the input page and the results page will not work.
Creating ODBC Input Form Page
- Create a new input form. Add a text field to enter your value. To insert a text field click Insert on the menu bar. Highlight Form Field, then click on One-Line Text Box. The window changes to as shown below:
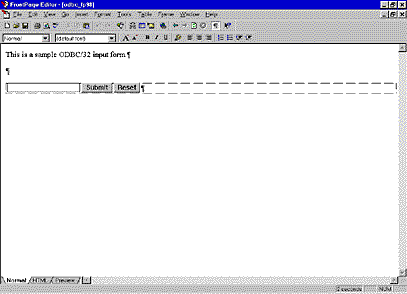
 Save the ODBC Form Page with a .htm extension. This being your input page.
- Select the text box. Right click the mouse button and select Form Field Properties. The Text Box Properties dialog box will then appear.
- Name the Text Box, then click OK.
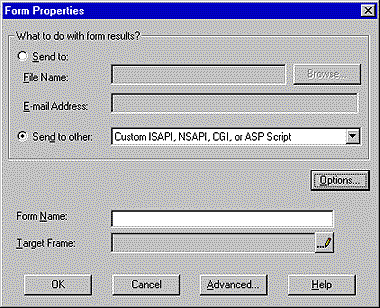
- Right click inside the Form Field and select Form Properties. The Form Properties dialog box will appear. Under What To Do With Form Results adjust the Form Properties to ‘Send To Other’.
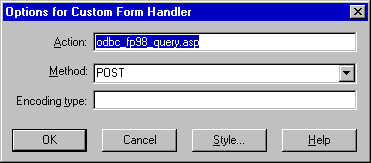
- Select ‘Options’ from the Form Properties dialog box. The Options for Custom Form Handler window will appear.
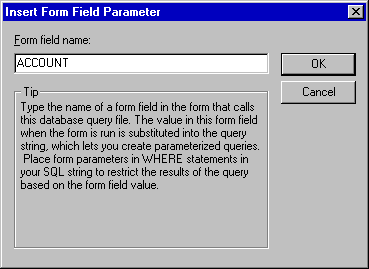
- Enter the name of your active server page with a .asp extension. The correct .asp page must be specified, or the association between the input page and the results page will not work.
- Click OK.
- Click OK again when the Form Properties dialog box appears.
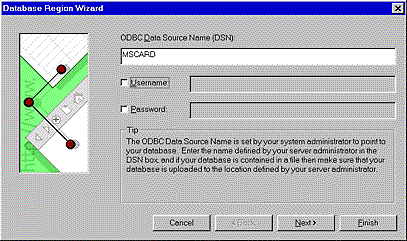
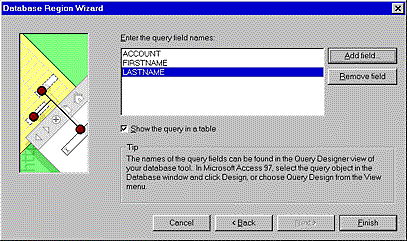
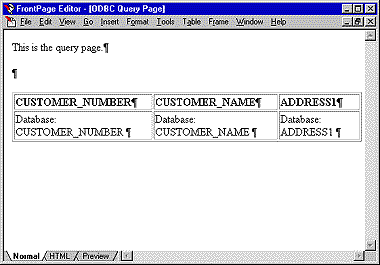
Creating ODBC results form pageNote: The correct .asp page must be specified, or the association between the input page and the results page will not work.
Note: Pay close attention to whether you are using caps lock or no caps in the input form page on the web. Image character keys are case sensitive. |