
eFORMz Support for Reading Zebra Printer Language (ZPL) Files
To follow along with this tutorial on importing ZPL, download the following: ZPL Input Sample
Many different types of files can be used as input to eFORMz, including PDF, text, XML, captured print spool files such as those going to a PCL 5 printer, or label files such as ZPL files.
The Zebra Printer Language (ZPL) format is a full-featured printer language for producing labels that contain text, barcodes, lines and boxes, and graphics. When using a ZPL file as input, eFORMz reads in the individual elements on the label and converts them into the eFORMz proprietary device-independent format. The contents of the label can then be combined with other elements to compose the desired output, and this output can then be sent to any output device or file type supported by eFORMz.
The following simple exercise demonstrates how eFORMz can read in a ZPL file and add, remove, or change elements of the label to create the desired final label.
Simple Exercise to Work with ZPL Files
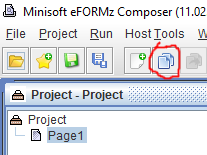
Run eFORMz Composer, then create a new project, a new page, and a new form within that page. Click the “Create New Project” button to create your new project. Select the “Add Page” button to add a page to your new project. Click OK on the “Page Properties” dialog box. Then click the “Add Form” button to add a new form to your page.
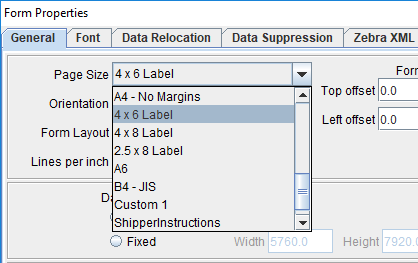
On the Form Properties dialog box, select “4 x 6 Label” from the Page Size dropdown:
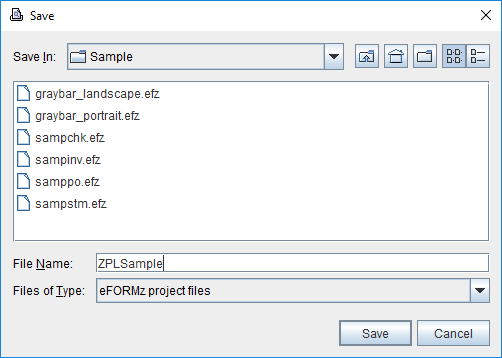
Save the project, by clicking the “Save” button. Double-click the “Sample” directory to open it. Then type “ZPLInputSample” in the “File Name” field, and click the Save button to save the file:
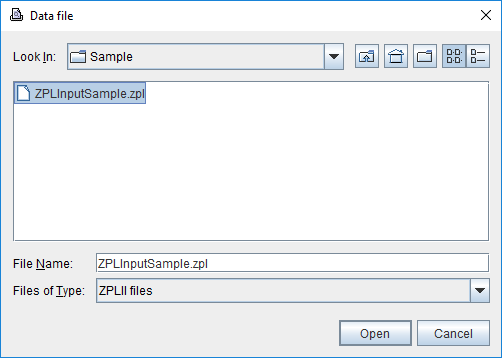
Next, open the ZPLInputSample.zpl file. Click the “Open Data” button on the Viewer window to open the ZPL file. Select “From file” and click “OK” on the “Select” dialog box that appears. Now find the file you downloaded, select it, and click Open.
You can now see the label contained in the ZPL file shown in the eFORMz Viewer window.
Creating a Variable from Text on the Label
Now, let’s create a variable from some text on the label. Right-click on the “PO#: 12244484” and select “Add Variable…”:
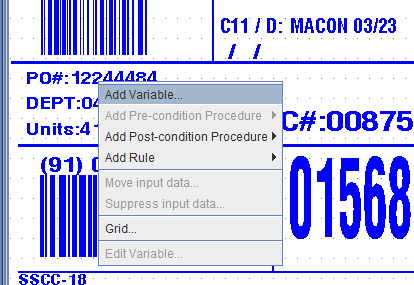
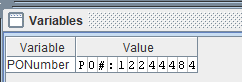
Name the variable “PONumber” and click OK. And in the Variables window, you can see its value, which comes directly from the ZPL label:
Creating a Variable from a Barcode
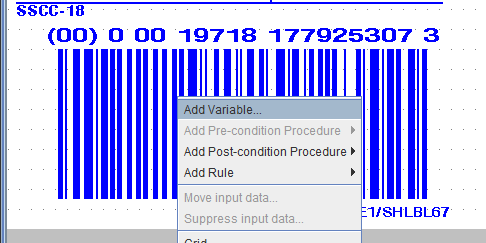
Let’s create a variable to contain the value encoded by a barcode on the label. Right-click on the SSCC-18 barcode, and select “Add Variable…”:
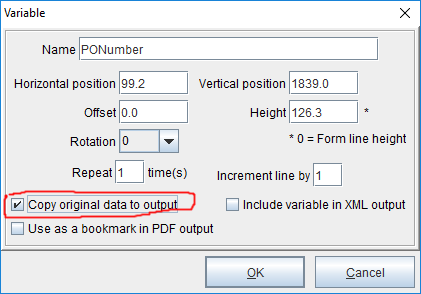
Name the variable “SSCC18BarcodeValue” and click OK to add it. Note that when you create a variable from some portion of the label, that portion disappears from the output. You can display the variable data on the output by right-clicking on the variable in the Project window, selecting “Edit…” and check the “Copy original data to output” checkbox:
Placing a Value on the Label for Output
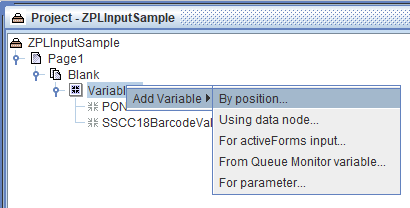
Create a new variable by right-clicking on the Variables node in the Project window, and select “Add variable > By position…”:
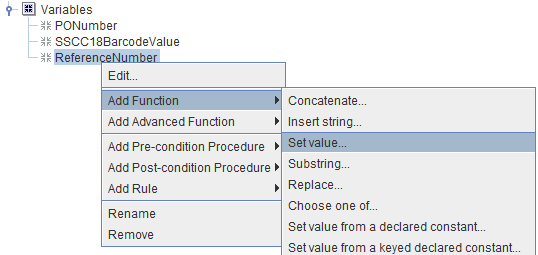
Name the variable “ReferenceNumber” and click OK. Give the variable a value by right-clicking on the variable name in the Projects window, and select “Add Function > Set value…”:
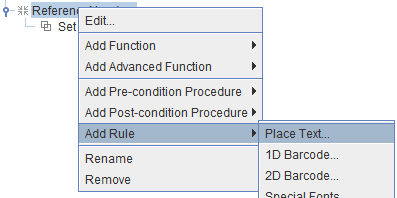
Type some numbers for the reference number, then click OK. Finally, place this text on the label by right-clicking the variable name, and select “Add Rule > Place Text…”:
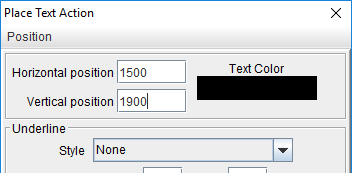
Give the rule a name, such as “Rule ReferenceNumber”, and click OK. Type “1500” in the Horizontal Position, and “1900” in the Vertical Position (these values are in deci-points, with 720 deci-points to an inch), then click OK:
Notice this text now appears in a Courier New font (the default font, which you can change), above the “DC#:00875” on the label.
Conclusion
You have now seen how eFORMz can accept a ZPL file as input, and bring in all the text, lines, barcodes, and boxes defined in the label. You can define variables from data on the label, add your own output to the label and much more. We haven’t shown how you can hide portions of the incoming label, move rectangular sections to be in a different location on the output, change the font of text on the label and more.